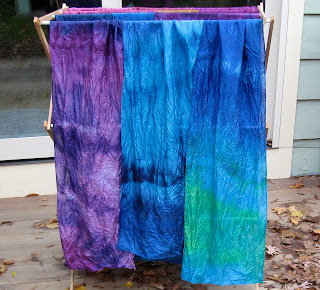
Last week I was busy dyeing silk scarves for a church fundraiser. The technique is something I cobbled together from various sources, and it works for any protein-based fibre (basically of animal origin, like wool & silk) although different fibres take the dye with different intensities. I use fibre-reactive dyes (I purchase them from
Dharma Trading Company) which are also called procion dyes. The way I fix the colour, or make it permanent, is by using white vinegar and heat. Silk scarves come out quite dramatically, as you can see, and you would hardly believe I was able to dye them in my microwave, all in one day :)
This sort of dyeing is one of the few things that makes me glad I have an unfinished basement, so that I don't have to worry as much about the dye getting all over. That doesn't mean that I don't put down dropcloths (I dye in the laundry area, so I have to protect the washer & dryer & anything else my laundry might come into contact with, or else I'll regret it!). I actually use a well-protected washer & dryer as my staging areas, since the nearby stationary tub is an important part of the process.
Because I want to get right down to the dyeing, I use silk scarf blanks which I also purchase from Dharma. I like a minimum length of 72", and usually use the 14"x72" silk habotai scarves. I have also used the silk chiffon scarves, which are nice but not as shiny. Dharma also has habotai silk veil blanks, which are gorgeous & floaty. The end result is more like a silk shawl, but it's so light it can go around your neck like a scarf. I've experimented a lot with the different blanks that Dharma has & have settled-on the habotai scarves because of their price & versatility. But any silk scarf can by dyed using this process, so I do recommend messing around with different ones till you find what you like.
The same goes for colour. I have a about 12 colours that I use regularly, but you could get by very nicely with just 5 or 6 basic colours, which is nice for starting out. The dyes arrive in powder form, which means they'll last a long time, but you alsohave to mix them with water to use them (the Dharma catalog & website has good directions for
mixing for tie-dyeing, which is essentially what I'm doing). That's about the only part of the process that is toxic (since you mustn't inhale the powder), so a mask is essential. I also use disposable latex gloves for most of the process (because they're lighter & less clumsy than rubber gloves) & I get my masks & gloves at
American Science and Surplus. To hold the dyes in liquid form I recycle my dish soap bottles from
Mrs. Meyers (I love the lavender scent :). These bottles are much sturdier than the usual dish soap bottles, but you can try grocery store ones & see if they work as well. My bottles hold 16 oz. which are on the large-ish side for squirting inside the bags, but they also last longer so I'm not mixing as often (a good thing). Something else that that you need for mixing is a measuring teaspoon, and funnels make the whole process much easier. I got by for a few years by making paper funnels ahead of time, but they aren't as stable as plastic & when you're trying to minimise the mess, using something tippy and wonky doesn't hold back entropy- or so I have discovered...
This is probably a good time to mention that equipment used for any dyeing must be segregated from your usual kitchen tools. Even though the liquid dyes aren't harmful, they're not to be ingested either, so you're safest using dyeing tools for dyeing only. That goes for potholders, towels, measuring cups, you get the drift. Since I dye in my knarly basement I have shelves to store my dye equipment & never bring it upstairs unless I'm using the stove (or microwave).
Other equipment needed for fibre-reactive dyeing is: 2 gallon ziplok bags, a glass pie plate or casserole that fits in the microwave, at least a gallon of white vinegar (from the grocery store), a drying rack of some sort, & a large bucket is helpful, as is something called synthrapol (Dharma has their own brand of this), which is a soap used to prevent colours from bleeding when dyed items are washed in it.
I use 10 lb. flour bins for my soaking buckets because they're sturdy, have good lids, and I had them laying around :) I label everything, so there's no possibility of getting mixed up, and because I have a bucket for soda ash solution (for dyeing plant-based fibres like cotton t-shirts) as well as a bucket for vinegar. I always put the lids back on after taking something out to be dyed, so I won't spill dye into a bucket with undyed scarves in it.
Scarves need to be soaked for at least an hour, but overnight is best. Once I'm ready to go- dyes mixed, area protected, ziplok bags out, gloves on, ah! I nearly forgot! Wear at least an apron, if not old clothes to dye in. There's nothing like dyes that need fixative to stay permanent for staining what you don't want dyed anyway- go fig. I actually found an old lab coat for this bit of dyeing. It provided much more cover than an apron & it was warmer... our basement is getting colder as the year turns. Anyway, once I'm ready to go, I think a bit about colourways. I have evolved some colour combos & theories in the past few years of dyeing. The scarves take the dyes brilliantly, so it's all a matter of thinking of what's popular & what's fun, why are you dyeing scarves & for whom. I use a minimum of 3 dyes per scarf, & try to think in terms of adding "zing" to my combos, so they won't be boring. Zing colours are unexpected in some way, but can also tie things together. That said, I also usually do scarves in colourways of blues/greens/purples or reds/maroons/bronze. Fuschia, amethyst, & grape are crossover colours, as is yellow. Yellow is very difficult to keep as just yellow, since it tends to be overcome by neighbouring colours in the rinsing. So I like to use yellow to change turquoise to a beautiful green, and red & fuschia to shades of orange & peach. Since these scarves are for a fundraiser, I don't want to make anything too weird to be enjoyed by someone out there...
The basic technique for dyeing is this:
Pull from 1-3 scarves out of the bucket & squeeze out excess vinegar. If I'm doing more than 6 scarves I'll do them in sets of 2 or 3, although it's harder to get enough dye into 3 scarves & there's a risk of some white places remaining. If I do sets, I fold each scarf differently, so the colours will take in different places & make each scarf unique. I fold them in thirds or fourths & lay them inside a 2 gallon ziplok in a horseshoe shape. Then I decide which colour will be the middle of the horseshoe, the transition colour, and start there. I shake the bottle of dye, pop up the top, put the bottle in the bag, & squirt dye onto the scarves, working it into the scarves with my free hand (needless to say, both hands are gloved). I roll the scarves a bit to make sure the dye is getting to the other side, & keep squirting & mooshing until I've covered enough area. Retreat from bag, rinse hands & bottle, grab next colour, head back into the bag to colour one of the legs of the horseshoe. Make sure that there's plenty of dye in the transition areas from one colour to another. That's where the most interesting stuff happens!
Once the whole thing is coloured, I rinse, & then zip the bag except for the last 2 inches (very important!!). I place the bag in the glass pie plate, take it upstairs with the potholder, place the plate & bag in the microwave, & microwave for 2 minutes. If you're the nervous type, go back & dye the next scarf(ves) rather than waiting around. It gets very big & puffy in the microwave & you always think it's going to pop, but if you left 2" open it won't! The potholder is for carrying the plate back to the stationary tub, where I leave the bag to cool while colouring/microwaving the rest of the batches.
 Silk doesn't felt, so you don't actually have to let it cool completely before rinsing (like you have to do with wool yarn). I switch to regular rubber gloves for rinsing because they're stronger. At the rinsing step I find it helpful to segregate the colours by red tones & blue/green tones, which prevents muddying as they soak. I first rinse each bag of scarf(ves) in coolish water to remove the vinegar, minimising the chance of muddying the colours, and rinse the bags as well so they can be dried & reused- I have some I've been using for 2-3 years, surprising but true. Then I put the red tones in one bucket or side of the stationary tub, and the blue/greens in another with lots of lukewarm water to soak. After a half an hour or hour, dump out the water & refill. Repeat. I usually add synthrapol after about 3 or 4 rinses & then make sure that gets rinsed out. When the rinse water looks more like weak koolaid, I call it quits & put everything through the spin-only cycle of my washer. Then I hang them all up on drying racks. (In the picture of orange/purplish scarves, you may notice one that's orange with yellow stripes. That one was made using natural dyes- safflower and brazilwood- and a shibori technique.)

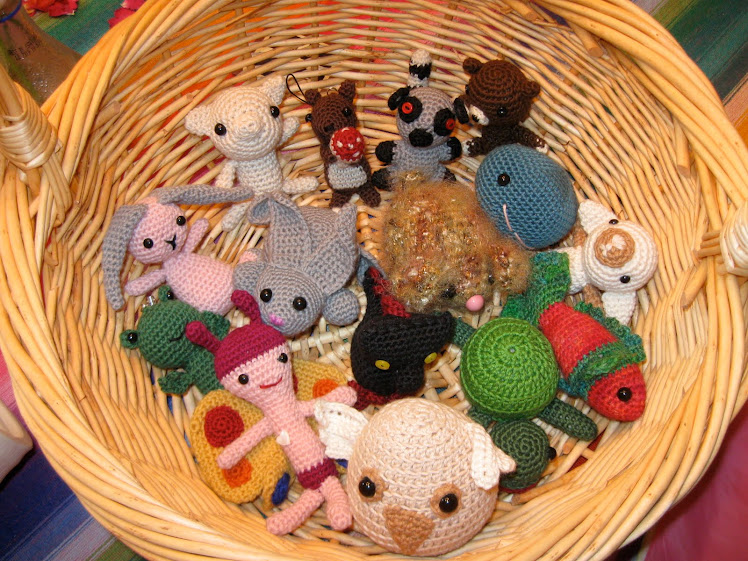
The wool yarn in the picture above was dyed using pretty much the same technique. As you can see in the ball in the middle, not all wool takes the dye with the same intensity. The middle ball is 100% wool & it takes the dyes with the least intensity. Adding silk (the bottom-middle ball is wool/silk blend) makes a big difference, as does adding nylon, in the case of sock wool, or using wool superwash wool, which covers all the rest of the skeins. As mentioned above, you also have to let the skeins cool completely before rinsing, and for that matter, you have to dye them in the skein, making sure the skein is tied in at least 4 places to prevent tangling.
I hope this little foray into the fun of fibre-reactive dyeing inspires someone else to give it a try! Let me know how it goes...


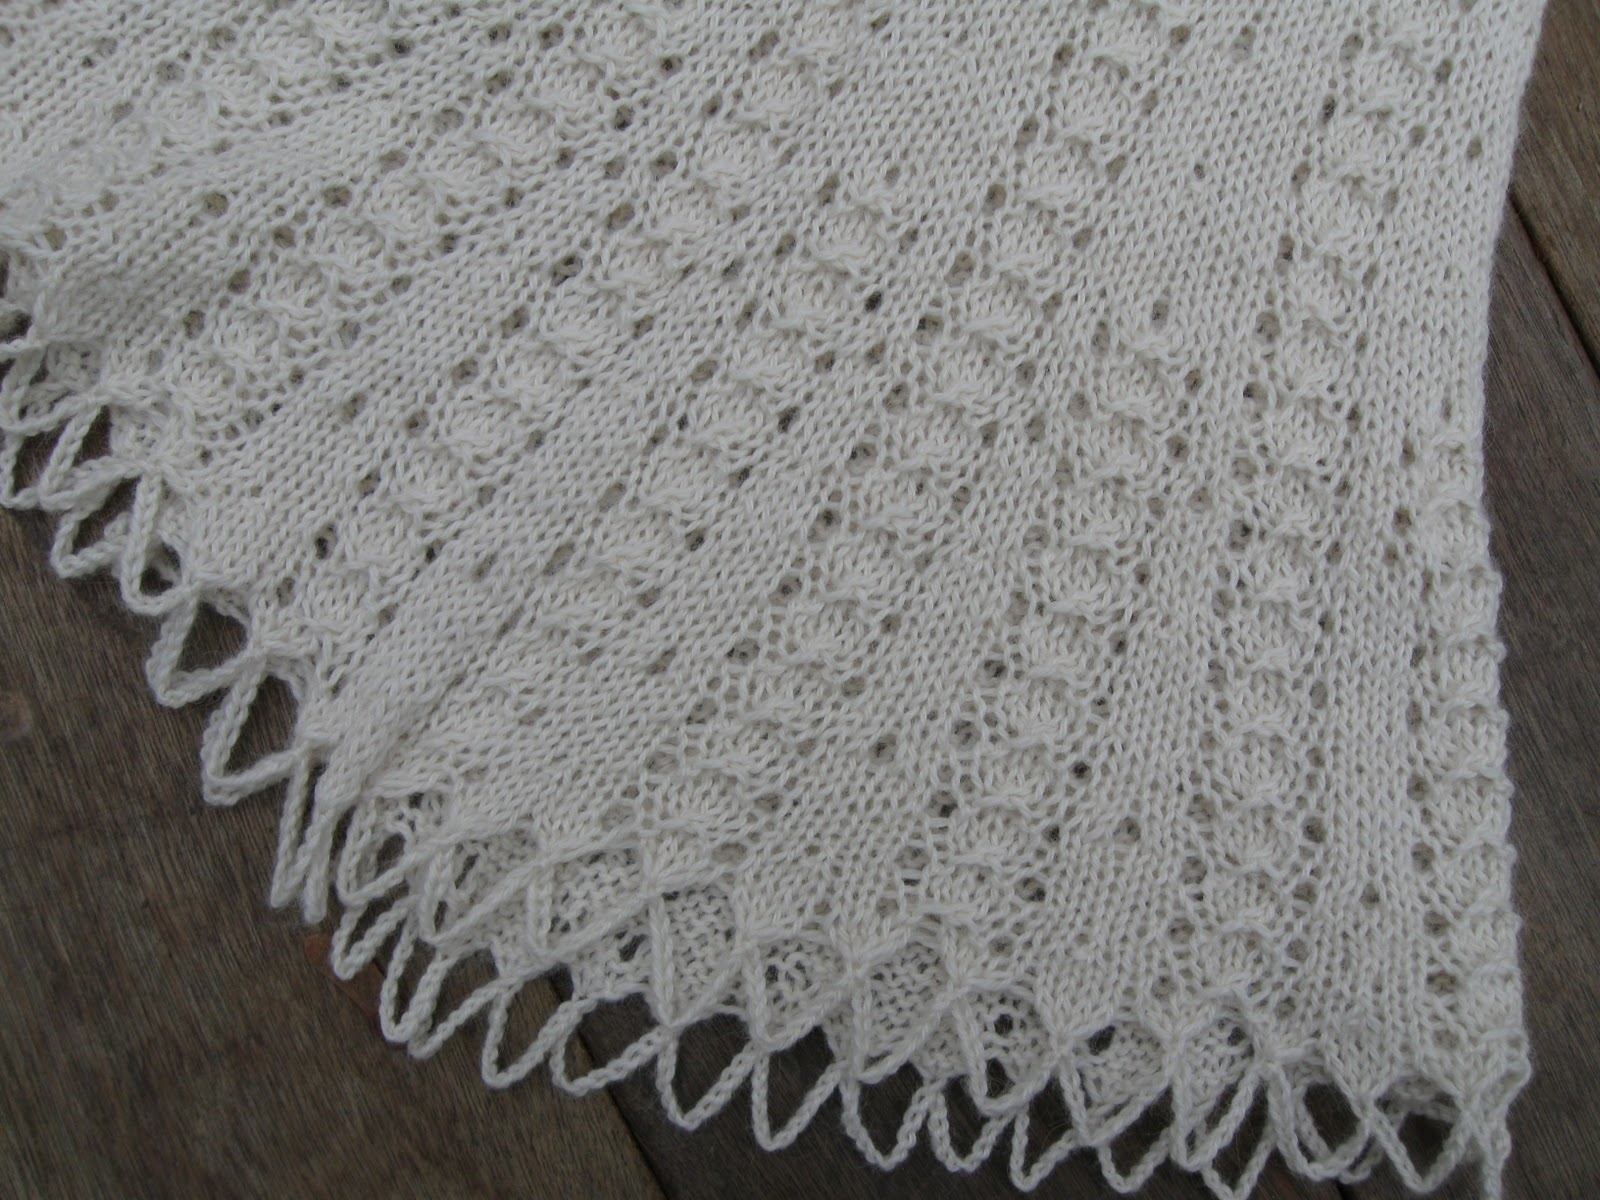
 The dimensions I'm basing my designs on came from the new Interweave Knits holiday supplement. As I was browsing through, the idea of neck warmers appealed to me but neither of the designs in the book did. I wanted lace! Elegant, flowing lace... I swatched the lace for the grey neck warmer & then calculated it for the larger, bottom end, which worked well for the lace I'd chosen, and for the method of decrease I'd worked out for getting it from the larger diameter to the smaller... The neck warmer patterns I'd looked at had used a consistent decrease throughout, so the prototype looks like a blunt-topped triangle. And although I like it very much & wear it all the time, I came up with some better ideas that I have incorporated in the designs for the others.


