amigurumi

amigurumi
Showing posts with label natural dyeing. Show all posts

Tuesday, May 31, 2011

Perdita's Shawl

Howdy! Here's yet another recently finished project, which I made for the Ankh-Morpork Knitter's Guild Guild Wars 3. I blogged my other project for GW3 here, my first Rippled Wrap. This here is my second, because I really like this pattern! Plus, I found the perfect yarn for it while up in my attic fibre storage area: it's naturally-dyed, fingering-weight alpaca yarn that I dyed a few years ago. I had been thinking of weaving with it, so I'd purchased some black alpaca of the same weight to use with it. Sadly all of it became moth-eaten :( I was able to reclaim the yarn I'd dyed with not much loss (the black was chewed terribly), and was looking for a project where I could use the multiple, small balls of yarn that I ended-up with. Enter the Ripple! 

I used an I/9/5.50mm hook to get as light a fabric as I could (without it being to loosey-goosey). The alpaca is slightly fuzzy so it has more body than a fingering-weight yarn usually has, but it feels nice on my shoulders (& will feel even nicer when it isn't 80 degrees out!). 
As you can see in the close-up, I decided to edge it on black single-crochet. As mentioned above, the black alpaca fared much worse than my hand-dyed yarn & has sat around looking sad for a long time.
As I was getting close to finishing Perdita I decided I should try to reclaim some of the black for edging, so I put it on the swift & have been hand-unwinding separate strands for a few days now. Just one lump of it was sufficient to finish the shawl, luckily! Who knows how long it may take me to unravel it all from the swift, though...
As you've probably guessed, each stripe was cut at the end of each row & a new colour tied-on. 
It was kind of a pain early on (although it used-up the smaller balls of yarn nicely), but got better as the rows got longer. As it got larger & the ends proliferated, I periodically stopped crocheting & spent some time working the ends in, so that I wouldn't have it all to do at the end. That way, when I was actually done crocheting, there was only about an hour left of weaving ends, then I could do the single crochet along the straight edge (which helps cover up any bumps from tying new colours on...).

And, who is Perdita, you may ask? She's a character in some of Terry Pratchett's Disc World books, of course. She's the main character of Masquerade & becomes one of the Witches that Sir Terry likes to write about. I like to think she'd have worn a shawl of this kind during her brief, dazzling career on the stage!

Monday, April 4, 2011

Naturally-Dyed Gallery


Hot on the heels of my recent natural-dyeing adventure posts, I thought I'd put up a gallery of things I've made from yarns that I've naturally dyed over the past few years. It was kind of like a treasure hunt, looking around the house, in the winter woolies basket, & on the bodies of my son & husband for things to photograph.

The photo at the top is of some Latvian-style mittens (patterns from Lizbeth Upitis' Latvian Mittens book) that I made about 7 years ago. Most of them were given as gifts or to charity knitting projects. They are a mix of indigo, cochenille, & yarrow-dyed yarns, & naturally brown & white yarns. (On a side note, I'm really glad that I have been photographing things on-and-off over the years, because I absolutely don't remember making these. I remember getting the book & getting all fired-up about making stuff, but have no real memory of making this many pairs of mittens...)

Another of the older photos that I found is this one, taken on a beach in California during a 2004 family trip to San Francisco. It's my version of the Mobi-Q Shawl, designed by Margo Carr, from Handwoven's Design Collection 19. I wove it on my Mighty Wolf loom from all handspun & naturally-dyed yarns & it's one of the crowning glories of my fibre-life. I had always wanted to weave something useful like this from my handspun, & the natural dyeing was just icing on the cake. I used all of my usual plant-based dyes and most of the wool is Corriedale spun on my Lendrum double-treadle wheel over a few years.  I took the shawl apart after a few years because it wasn't as functional as I'd hoped & is sitting in lavender-soaked cotton balls, waiting for an idea to strike for it's next incarnation.
This is the last of the real oldies, & the only photo I have of the Gansey sweater I designed & made for Brendan when he was 8 years old, specifically for this sailing vacation around Cape Cod. I indigo-dyed Lion Brand Fisherman Wool yarn & put Gansey patterns Brendan chose from a book on the front. When he outgrew it 3-4 years later, my mom wanted it (it fit her :) so she has it now.
Here's the vest I made for Charlie for our 20th anniversary in 2008. Many of the yarns are from the experimental dye pots from the summer of 2007, including birch bark, rhubarb leaves, & alkanet. He has a list at work of which stripe is which plant material because some folks like to know :) Also, I decided that just striping it would be boring, hence the patterned edges on each stripe.

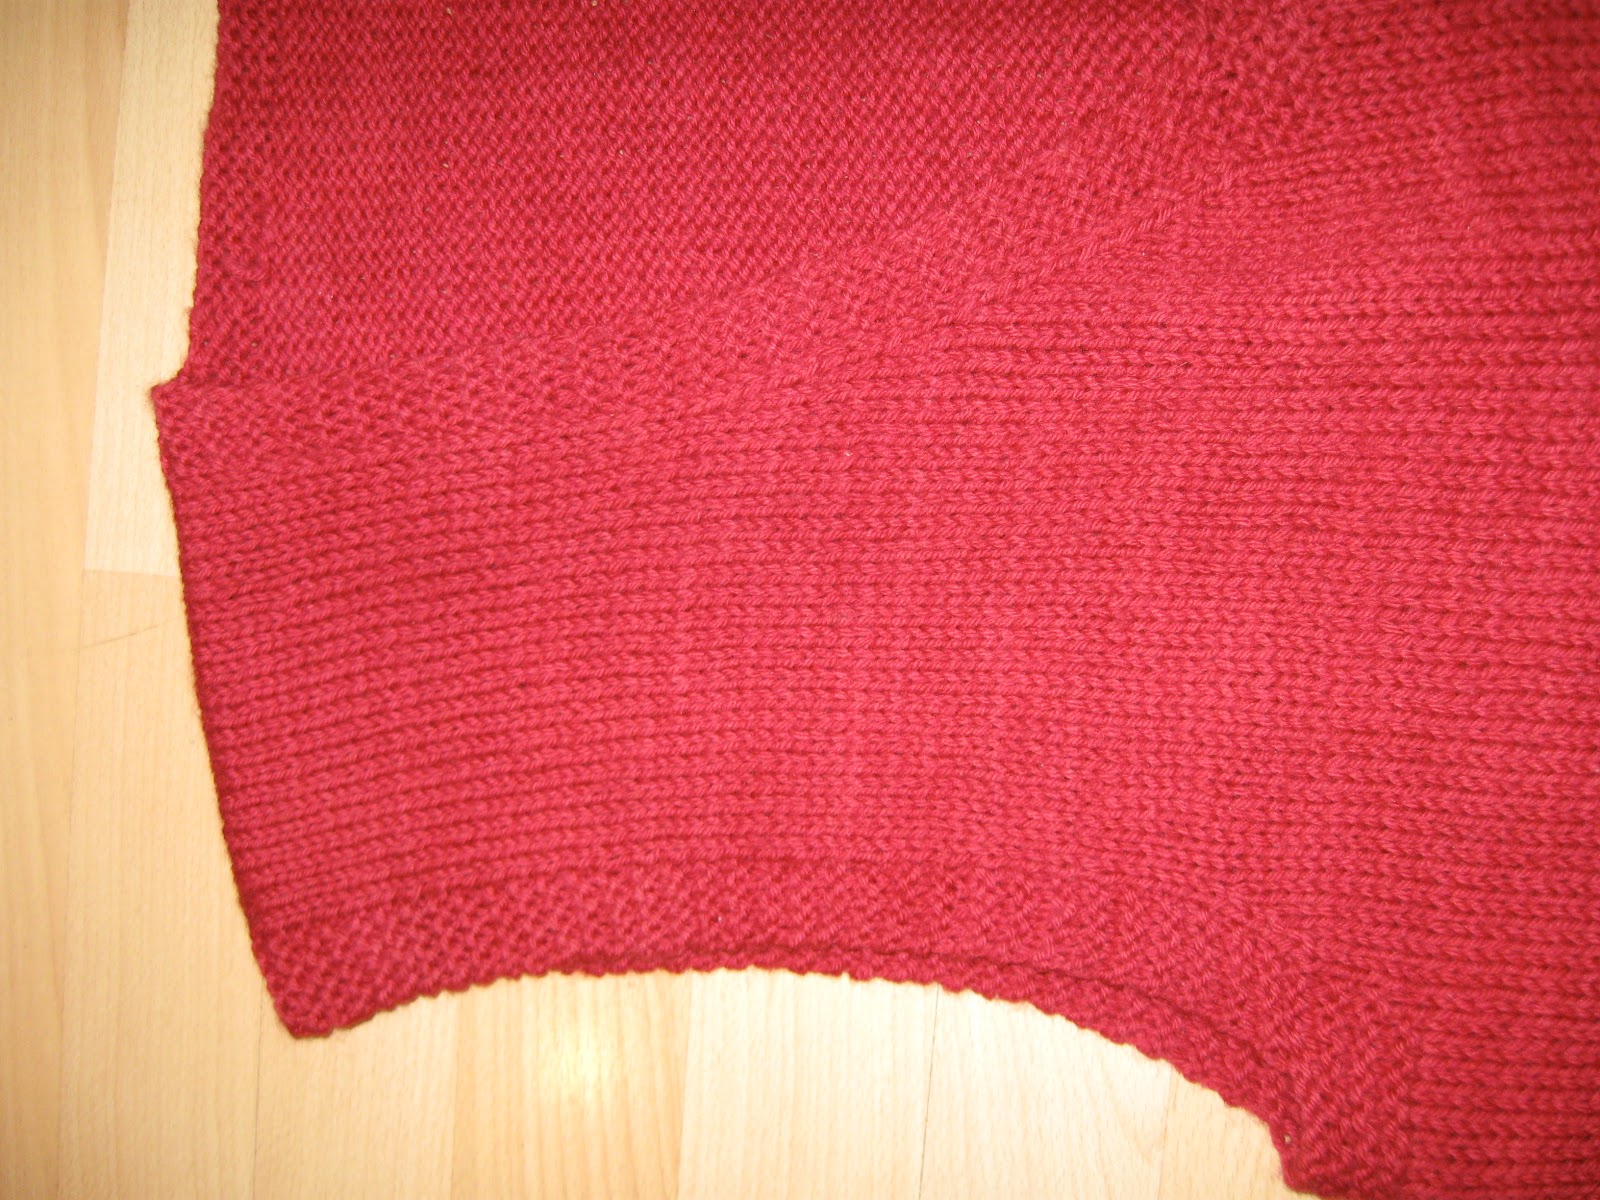
The year before I made the anniversary vest, decided I wanted to make him a red vest (I usually make Charlie a vest for our anniversary because it's in early December, right when he needs warm clothes :). So I dyed Knitpicks merino worsted yarn with brazilwood (all skeins in the same dye bath) to get the heathered red of this vest. (A side note on the vest pattern: it's adapted from a WW2 Red Cross pattern that I found in Charlie's grandmother's things. I made it longer (he's a tall guy) & adapted it to knit in the round. I love it because the armhole & neck edgings are knit at the same time in garter stitch, so there's no pickup afterward. It's about the only vest pattern I use these days.)
Here are Charlie's snow-shoveling gloves, made from Elizabeth Zimmermann's "Winter Spruce" pattern, from Knitting Around.
And here are this year's winter gloves, made from shibori-dyed Knitpick's Gloss fingering weight yarn, dyed with yarrow & indigo, to get shades of yellow, blue, & green. The pattern is from Ann Budd's the knitter's handy book of patterns. I've placed them in the photo so you can't see the mends :( These gloves are destined to be felted & recycled as something else, as about 4 fingers have either mends or holes in them...

And, last of the photos of Charlie's stuff, a pair of shibori-dyed socks from Knitpicks' fingering-weight sock wool. The plants I used were birch bark & Rose of Sharon. Pattern- my own.

These are the front & back of my Adult Babies & Bears' Sweater from Cottage Creations. I used lots of odds & ends of the usual dyes & combos, & made sure that no 2 colours were next to each other for the whole sweater :)
This mitten & leg-warmer set were made from some yarn I dyed back in 2002. A friend had brought me some skeins of single-ply dk-weight yarn from New Zealand & I dyed them in golden marguerite, onion skins, brazilwood, indigo, & marguerite in indigo for green. These are the mittens I've used this winter, warm but light.
Here's another pic of my big flowers shawl, made with the popular motif from Nihon Vogue's motif book & Lion Brand Fisherman Wool, in lots of natural colours, after the 2007 dyeing. Among the plant dyes used were alkanet, indigo, yarrow, onionskins, brazilwood, rhubarb leaves, birch bark, & safflower.
I posted this bag back in September. I made it from Knitpick's bulky weight yarns from dye pots I ran the summer of 2008. I noted that the yarrow dyepot lasted 3 full dyebaths before exhausting, giving very nice golds-to-yellows. The pale red is brazilwood exhaust, with the rusty-red being from the first dye bath. The purple & green were brazilwood & yarrow over-dyed in indigo.

For some other finished examples from naturally-dyed yarns, please see my Shibori 1 & Shibori 2 posts. Let me know if you're inspired to try natural dyeing!

Sunday, April 3, 2011

Sock Weight for Physical Therapy


Just a quick post today! (I'm collecting & photographing things for a naturally-dyed gallery post, so stay tuned...) Until then, my son suggested that I post today's little project. I am now in physical therapy post reconstructive back surgery (last January) & needed a weight at home for exercising. I knew instinctively that I wouldn't need to go out & purchase weights because there's so much stuff laying around...

Like Brendan's old, felty socks from 3 winters ago, which I then adopted (because, even felted, they were much bigger & fit over my socks). I found some fish-gravel in the basement, usually used for the bottoms of flower pots (we haven't had fish for some years) & was able to fit a kilo into one sock, a kilo being my target weight (for now). I just sewed it shut with some size 10 crochet cotton & voila!

We're nothing if not resourceful around these parts :)

A side note, regarding the felty socks. These socks were made from regular, superwash sock wool (from Knitpicks's Bare line- the fingering-weight sock wool) that I shibori-dyed in indigo. Now, Brendan is known for his ability to felt wool by just looking at it (in a sweaty-footed, growing-kid way) but he's never felted superwash sock wool before this. It's not the only time that indigo-dyed superwash socks have felted, & I've come to the conclusion that the alkalinity of the indigo bath does something to the superwash process (ie: removes it). Good thing we have uses for felty socks around here, huh? 

Wednesday, March 30, 2011

Shibori-Dyed Yarn Part 2: Shibori Dyeing


So, now that I've posted about the dyeing part of it all (at least with naturally-occurring dyes) I'll move on to the shibori part. Shibori is a specific method of dyeing that makes patterns on the thing being dyed, rather than the whole thing coming out uniformly dyed. Tie-dyeing is a basic form of resist, or shibori dyeing, but it's been taken to high art in places like Japan (where the word shibori comes from). As a child of the 60's I've been tie-dyeing for many years :) As a knitter, I've enjoyed making socks & such from fair-isle dyed yarns for as long as they've been available. The idea that I could make multi-coloured yarns similar to the ones I'd been making socks from was hanging around somewhere in the back of my brain, but it didn't coalesce until we made our first family trip to Japan in 2007.
We were in Kyoto & had decided to spend the day visiting fibre-related places. We began the day at Aizenkobo, which means "Indigo Dyeing Workshop", a place we'd discovered in the wonderful book Old Kyoto by Diane Durston (a book I highly recommend if you're heading to Kyoto). It was a slow day at Aizenkobo & I must have asked the right questions, because the owner decided to spirit me away to the back of the shop & give me a tour of the indigo vats, share album after album of pictures of indigo cultivation & samples dyed with lots of natural dyes, & pretty much tell me anything I ever wanted to know about indigo dyeing (he demonstrated the fire-resistance of indigo-dyed fabric by trying to set a scrap on fire in an ashtray...). My husband & son were reduced to playing Uno in the empty shop & wandering the street outside looking for a cold drinks machine while all this was going on, but I was very grateful for their patience. In the end, we bought a load of gifts & things while we were there (shibori-dyed sashiko thread which I used to tie a quilt with fabrics from japan for Brendan a few years later), but the biggest gift I received was the kernel of an idea that formed while I was looking at all those samples & pictures- how to make shibori-dyed yarn.


When we got home in mid-July 2007 I got to work almost immediately. I first made a chart of how many colours I thought I could get on one skein of yarn from 2 dye baths (plus a mordanting bath) & came up with four. I didn't want to put the skeins of wool through so many dye pots that they felted (out of self-preservation if nothing else), which is why I limited it to 2 dye baths per skein. I then got out Wild Color by Jenny Dean & researched all the dyes I could find around my house & neighbourhood, just to give them a try. I stocked-up on silk scarves, too, since I like to dye a silk scarf in any new natural dye pot, to give me an idea of how the colour comes out on silk (since I mostly dye wool yarn). Then I decided on my colourways- brown-based, red-based & blue-based.

Speaking of the yarns, as I mentioned in my first Shibori post, I dye with wool or wool-blend yarns because they can be mordanted & made colourfast. I go into even more depth about it in this post as well. For this series of dyeing, I used one of my main standbys: Knitpicks Bare yarns. I used peruvian & merino wools in lace weight, fingering weight, worsted weight; & wool & silk blend in fingering weight yarns for these shibori-dyed yarns.

I thought a bit about how I wanted to make the resist areas on the yarn- how to keep the dye from getting there- & decided to wrap them with yarn or string. So I went through my weaving stuff to look for different materials to wrap around the yarn. I decided that bast fibres would be best (cotton/linen/etc) because they don't take the natural dyes very well in the first place. I also came to the conclusion (as I was doing the wrapping) that thicker yarns/strings made for quicker tying, which helped my patience a lot :) One of my concerns when it came to tying was how to arrange the resisted areas so they didn't repeat (like the ombre yarns from my teen years that made weird patterns as you worked with them).  The other concern was how long to make the resist areas- short resists make for a speckled yarn, but it's not really possible to get long repeats when using yarn in skeins. In the end, I just experimented & took pictures of my experiments, so I could repeat any I liked. I used my swift to hold skeins for tying, plus experimented with tying skeins tightly around thick dowels.

Skein in the process of being untied & rewrapped for the next dye bath.
Skein wrapped around a dowel- ready for second dye bath.
By August I had collected the following dyestuffs to try: birch bark & leaves, rhubarb leaves, coreopsis tops (greens & flowers), elder leaves, onion skins, yarrow, rudbeckia flowers, & Rose of Sharon flowers (med. purple). I also purchased safflower, brazilwood, indigo, & alkanet. Of the above, I'd previously used indigo, brazilwood, yarrow, coreopsis, & onion skins before, so there was a lot of experimenting to do! I noted the colours that Jenny Dean got from the new-to-me dyes (with alum mordant, since I won't use anything else due to toxicity issues), & made sure to record my own results in my dye notebook (which I'm referring to as I write). I was careful to reproduce her suggested ratio of dyestuff to weight of goods (the weight of what you're dyeing with that dyestuff). Of the new dyestuffs, the only real dud was the elder leaves, which gave such pale results that I tossed the skeins into the safflower exhaust (2nd) bath in order for them to have any colour at all. (I talk about exhaust baths here as well.)

I also find that I can get nicer yellows from yarrow or coreopsis, so I probably won't bother with birch leaves again. I was expecting yellow from the rudbeckia (black-eyed susans) but got light brown, so that was a surprise, too. The birch bark gave medium rust-brown, but it was a major pain in the butt to harvest (you use the inner bark, which has to be chipped off the logs) so I probably won't be tempted to do it again. The Rose of Sharon flowers were really interesting to work with- they dissolved into a mucousy-mush when water was added (which explains why they're not nearly as messy to grow as magnolias, for example) & gave some lovely rosy-tans, especially on silk. The problem with harvesting them is to avoid the bees... I was nearly stung twice!


I ran the dye baths from lightest colour to most intense colour, so most started with tans & yellows & then ended-up in brown, red (brazilwood), orange (onion skins), or blue (indigo). On some skeins I left white areas, but on some I dyed over the white.


Here is one skein in the process of being untied. I dyed it first in coreopsis, which gave a goldy-yellow, then untied it in some spots to expose some white areas, & retied it over the goldy-yellow yellow in some areas. Then I dyed it in brazilwood. The result was some areas of white, gold, red, & orange.
I crocheted this shawl from the resulting yarn.
Here are some of the red & brown shibori-dyed skeins, & some scarves.
Here are skeins & scarves that ended-up in the indigo pot.
I did shibori-dye some scarves, as you can see.

And here are some socks that I knitted from the shibori-dyed yarns.
And the Spiral Scarf from Norah Gaughan's Knitting Nature.

The actual dyeing went on from the beginning of August to the end of September, because I kept thinking of something else I wanted to try. The tying & re-tying of skeins was probably the most tedious part of it all, but it was so cool to see what came out when they were all untied & rinsed!

And, as you can see, I've been having a lot of fun working with these yarns I dyed myself. Please let me know if this inspires you to give it a try!

Wednesday, March 23, 2011

Natural Dyeing: step by step dyeing with onion skins

Thanks to the miracle of modern medicine (reconstructive back surgery) I was able to ride the wave of my first shibori dyeing post and run the dye pot I've been wanting to do for over a year! When I looked in my notebook, my last recorded dye session was March 2009, so it was high time to get to it again. On the other hand, having to wait until my back was reconstructed (because I couldn't even imagine lifting heavy dye pots the way it was before surgery) allowed me to save a load of onion skins Unlike some folks I know, I tend to save them over time rather than go to the grocery store & ask for what's in the bottom of the crates. So it takes a while to save them up (although I'm pretty meticulous about saving them- there's a ziplok bag in the kitchen where I put them as I make meals, which gets emptied into a bigger bag in the basement).  I decided on Monday to start the process & fit the rest of it in & around my activities on Monday & Tuesday.  Today, as you can see above, I have 8 beautiful skeins of onion skin-dyed wool. I thought I'd document things as I went along, so I could blog the step-by-step process that I use to turn onion skins & wool into beautifully coloured wool :)

I learned what I know about natural dyeing from books mostly, & from some communal dyeing with friends from my local spinning guild. The main book that I use is Jenny Dean's Wild Color, with an understanding that natural dyeing is the least reproducible of the arts, & what may seem like unexpected or disappointing results from one perspective can be beautiful colours from another. In other words, I haven't always gotten the results Dean publishes in the book, but it's a very good place to begin, technique-wise. I have been natural dyeing for more than 10 years, and documenting everything in a notebook has resulted in the best resource possible for natural dyeing :) I try to record results as well as process, so that I won't forget, for example, that silk needs to be removed from a brazilwood dyebath before it boils or the colour will leech right back out.

Before I begin the step-by-step, I want to mention some terms & procedures. The first is "weight of goods" (sometimes abbreviated as "WoG"). Weight of goods refers to the weight of what you're going to be dyeing, & it must be weighed dry. WoG is used to determine the amount of mordant used to fix the dyes in that material, & sometimes used to determine how much dyestuff to use as well. Another very important thing to remember is when handling wool & boiling water, always go from cooler temperature to hotter temperature. If you plunge wool from a boiling vat into cooler temperature water, it will felt. But if you always go hotter, you minimise felting. And although you do stir the yarn in the dye bath, doing it slowly not only minimises felting but prevents scalds from splashing boiling dyebath. When weighing things, I use the metric system- partly because it's easier to calculate percentages in a base-10 system, & partly because all of my scales are metric. Mordanting requires precise measurement, but if you have to estimate a bit, estimate higher so you don't under-mordant your materials.

And, of course, what is mordanting? Well, you can boil wool with pretty much anything & get colour to stick, but unless it's a particular dyestuff (like rhubarb leaves, black tea, or black walnut, which all contain tannins) the colour will be fugitive, or non-lightfast. Protein fibres, like wool & silk, will take dye the best- bast fibres, like cotton & linen, are harder to prepare in a way that natural dyes will stick to them, hence the need for (& popularity of) aniline dyes. The best way to make protein fibres lightfast is to mordant them with chemicals that create a chemical bond between the dye & the thing being dyed. Many mordants use heavy metals & are extremely toxic, but a few- like the above-mentioned tannin-containing materials- as well as alum, are much safer.  Rhubarb leaves are toxic when ingested, so keep it away from the kids. Of alum, black walnut, & black tea, alum is the only one that doesn't act as a dye on it's own. so it's the best choice for mordanting anything you don't want to turn brown... :) Alum is used in conjunction with cream of tartar- I didn't really understand why until recently, reading an article at Geek Mom that explained that cream of tartar is a mild acid. I think that the cream of tartar (or "CoT" in my shorthand) balances the pH in the face of the alum, which is a mild base. Protein fibres take up dye better in an acidic environment, so this is my theory as to the use of CoT with alum.
alum & cream of tartar for mordanting

The first step in dyeing is to prepare what you're going to dye.  I decided to dye some Lion Brand Fisherman worsted wool. This is one of the yarns I usually choose because it comes in big, 8 oz (227g) quantities, is affordable, & I can buy it at my local JoAnn Fabric store. I decided to dye both white & natural grey Fisheman wool this time, just to see what I'd get. My other favourite yarns to dye are from KnitPick's Bare line of yarns. These are also affordable, in large-sized skeins, and in a bunch of different weights & fibre contents. This time I went for 2 fingering-weight yarns, the Gloss 70% merino/30% silk & Peruvian wool. These are in 100g put-ups, already skeined, but I add 2 more ties to prevent tangling. The Fisherman needs to be put into skeins before dyeing:

And then the skeins tied loosely (I alternate between the ends of the skeins of wool as ties & crochet cotton) in a figure-8 tie:

I use my niddy-noddy to put them into ~230 yard skeins, dividing each 8 oz ball in half. I also add tags made from washable interfacing, labeling the name of the yarn & the yardage or fibre content:


Because the Fisherman yarn still has some lanolin in it, & lanolin inhibits uptake of dye, I scour the Fisherman skeins before mordanting:
To scour wool, I run the hottest water from my taps into a basin or kitchen sink. Once the water's in, I add a few squirts of grease-cutting dish soap & gently swirl it around (trying to minimise bubbles here, folks). Then I gently sink the skeins into the soapy water. Then I wait at least an hour for the water to cool down. It's a bit smelly at this point, but it's a nice smell :) When I can safely put my hands into the water, I lift out the skeins, gently squeeze, set them aside, empty the sink, & fill it again with hot, hot water. No soap this time, just sink the skeins back into the sink & push them under. Wait, again, & then when you can put your hand in, they're ready for mordanting. If you don't scour (& I don't scour the KnitPicks yarns because they don't have detectable grease in them) you still have to wet them thoroughly before mordanting, so I tossed the KnitPicks skeins into the rinse water with the Fisherman skeins to really wet them.

Then, knowing the weights of the combined skeins of yarns from the label (3x 227g balls of Fisherman + 2x 100g skeins of KnitPicks wool= 881g WoG) I measured my mordants. The ratios I use are 10% WoG for alum & 5% WoG for cream of tartar, so I measured ~90g of alum & ~45g of CoT (using an old yoghurt cup). I half-filled my big mordanting pot with hot water & added the mordants, stirring well. Then I added more hot water to ~3/4 full. I added the wetted skeins to the pot, stirring them gently but completely into the water. It's important to keep the skeins moving as you go, so they don't take the mordant (of the dye, for that matter) unevenly. I use an old metal spoon for this, but an old wooden spoon, dowel, or anything heat-resistant will work. Then I put the pot on the stove & put the heat to high. I use an old rag or cottage cheese lid as a spoon rest while dyeing.

A brief word about tools- never use food cooking pots for dyeing, not matter if you're using food-safe dyes (or dyes that are food...). Although I can get a bit lassaize-faire with my measuring equipment when using alum, etc, I routinely use dye pots (& spoons, bowls, colanders, etc) for dyeing & keep them in the basement when I'm not dyeing. Dye pots get stained over time, too, & not all dyes are safe around food, kids, & pets, so it's just sensible to be careful.

Back to the mordanting:
The wool tends to float to the top when it gets hot, so that's another reason to stir gently every 5-10 minutes. Also, the skeins need room to move so try not to over-fill the pot. Nearly 900g of wool was pushing it a bit even for my big pot, so stirring regularly became even more important. It can take up to half an hour to reach boiling, so I put the lid on to speed things up. Don't leave a pot near to boiling or you'll have a mess & maybe more. I once left a simmering pot (distracted by my then-small child) & smelled gas about 15 minutes later. The pot had boiled over, put out the flame, & my kitchen was filling up with natural gas (!). I was able to ventilate things & disaster was averted, but I learned an important lesson! Bring a book or something while you wait. Once it reached a boil, I set a timer to 1 hour, turned the heat down low, put the lid back on, & let nature take it's course :)

If you are inclined, you can make the dye bath while you're waiting. I didn't have time on Monday, so I turned the heat off after an hour & just let the pot sit for the rest of the day (safest way to handle hot skeins is to let them cool first :). My understanding is that the mordant is completely taken up during this process, so you could reuse the leftover water for another mordanting session, (add more mordant) or even for making dyebath, if you want.

On Tuesday morning I excavated the onion skins from the basement where they'd been waiting for so long. I actually had 2 shopping bags full of them, but was reminded that onion skins have a mind of their own, being so crackly, light, & fluffy. So I was only able to jam one bag full into my big dye pot.
I added water until I could see it (the skins floated up some), but made sure it was a good distance from the brim, because I didn't want any boil-overs. Then I put it on high heat:
Here's the pot with the steam just coming off. When not taking pictures I put the lid on (to speed things up & save energy):
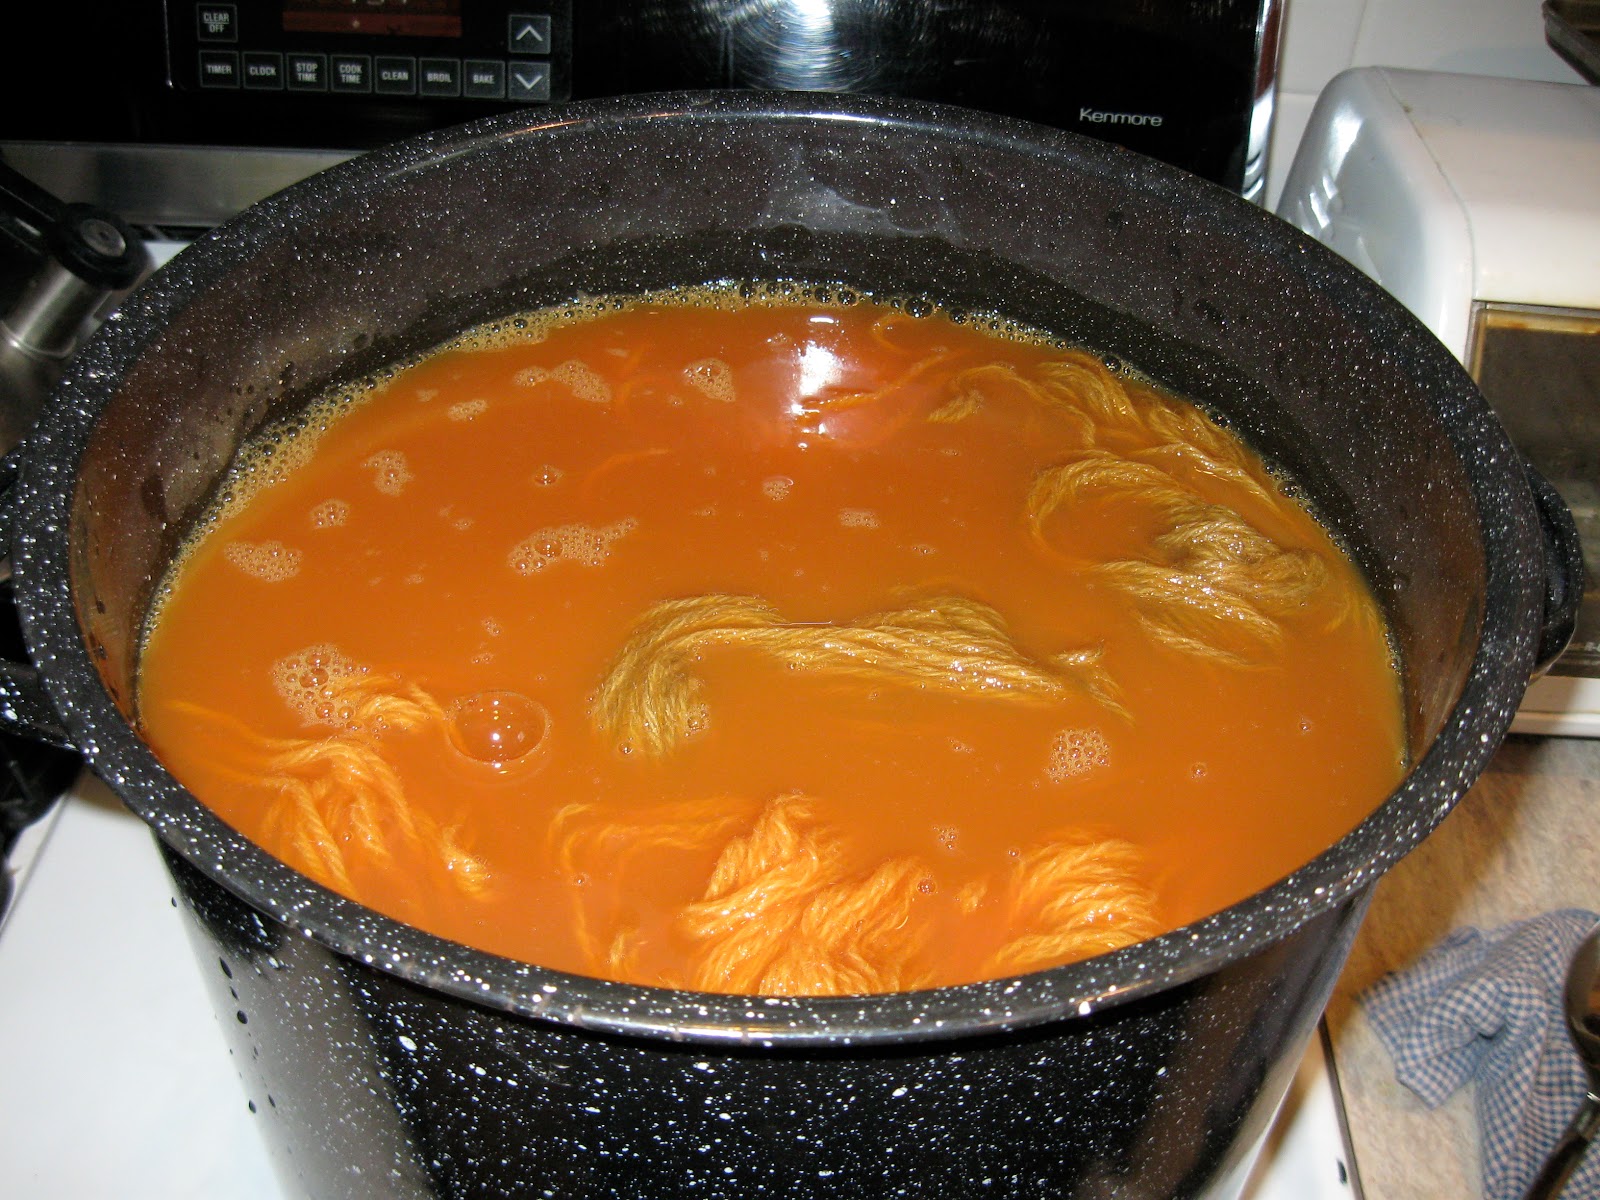
When they reached the boil, I did the same as with mordanting- gave them a stir, turned down the heat, put the lid on, set the timer for an hour, & let nature take it's course. Here they are at the end of an hour:
Then I prepared the strainer while the skins cooled a bit. I took the cooled skeins out of the mordant & set them in a bowl so I could use the mordant pot to receive the strained dye. I used cheesecloth because I had some hanging around, but muslin works well, as do old curtains :)
Do let the skins cool for at least half an hour before straining them, because they really splash when they're hot & you could be burned.
I let the whole thing sit in the strainer for a few hours (I had some errands to run) before gathering up the cheesecloth & squeezing it out by hand (thus staining my hands orange for the rest of the day...).

I added water to bring the pot to 3/4 full, stirred it, then added the still-wet, mordanted skeins. I only added 5 of them- 2 white fisherman wool, 1 grey fisherman, & both KnitPicks skeins. I saved the other 3 skeins for the exhaust bath, for lighter shades.  I added the skeins as quickly as possible, because I've had mordanted skeins pick up the dye so quickly that easing them in slowly caused uneven shading.
The dye bath looks a bit murky, doesn't it? Onions skins are one of the few dyes I use that doesn't completely exhaust (ie: the colour gets all used-up) & it always has this murky look- who knows why. Anyway, I put the heat on high, put the lid on, & stirred every 5-10 minutes until it reached a boil.
You can see (through the steam) that the murkiness clears up as the dye is absorbed into the wool. It's amazing to watch- the skeins get oranger & oranger & the dyebath gets more translucent as the heat gets higher. I simmered the skeins for an hour, then turned off the heat & carefully lifted the skeins out with a spoon.
Before the dyebath had a chance to cool too much, I added the remaining 3 skeins for the exhaust bath.
And then I repeated the same process for them. Meanwhile, I ran hot water into a bucket in the basement & put the first dyebath skeins in to rinse:
After half an hour, I repeated the rinse (lifting the skeins out before emptying & refilling the bucket). By the time the exhaust skeins were done, I could take the first bath skeins out & rinse the exhaust ones. Then, once rinsed, I spun them all on the "spin-only" cycle of my washer & hung them to dry overnight.
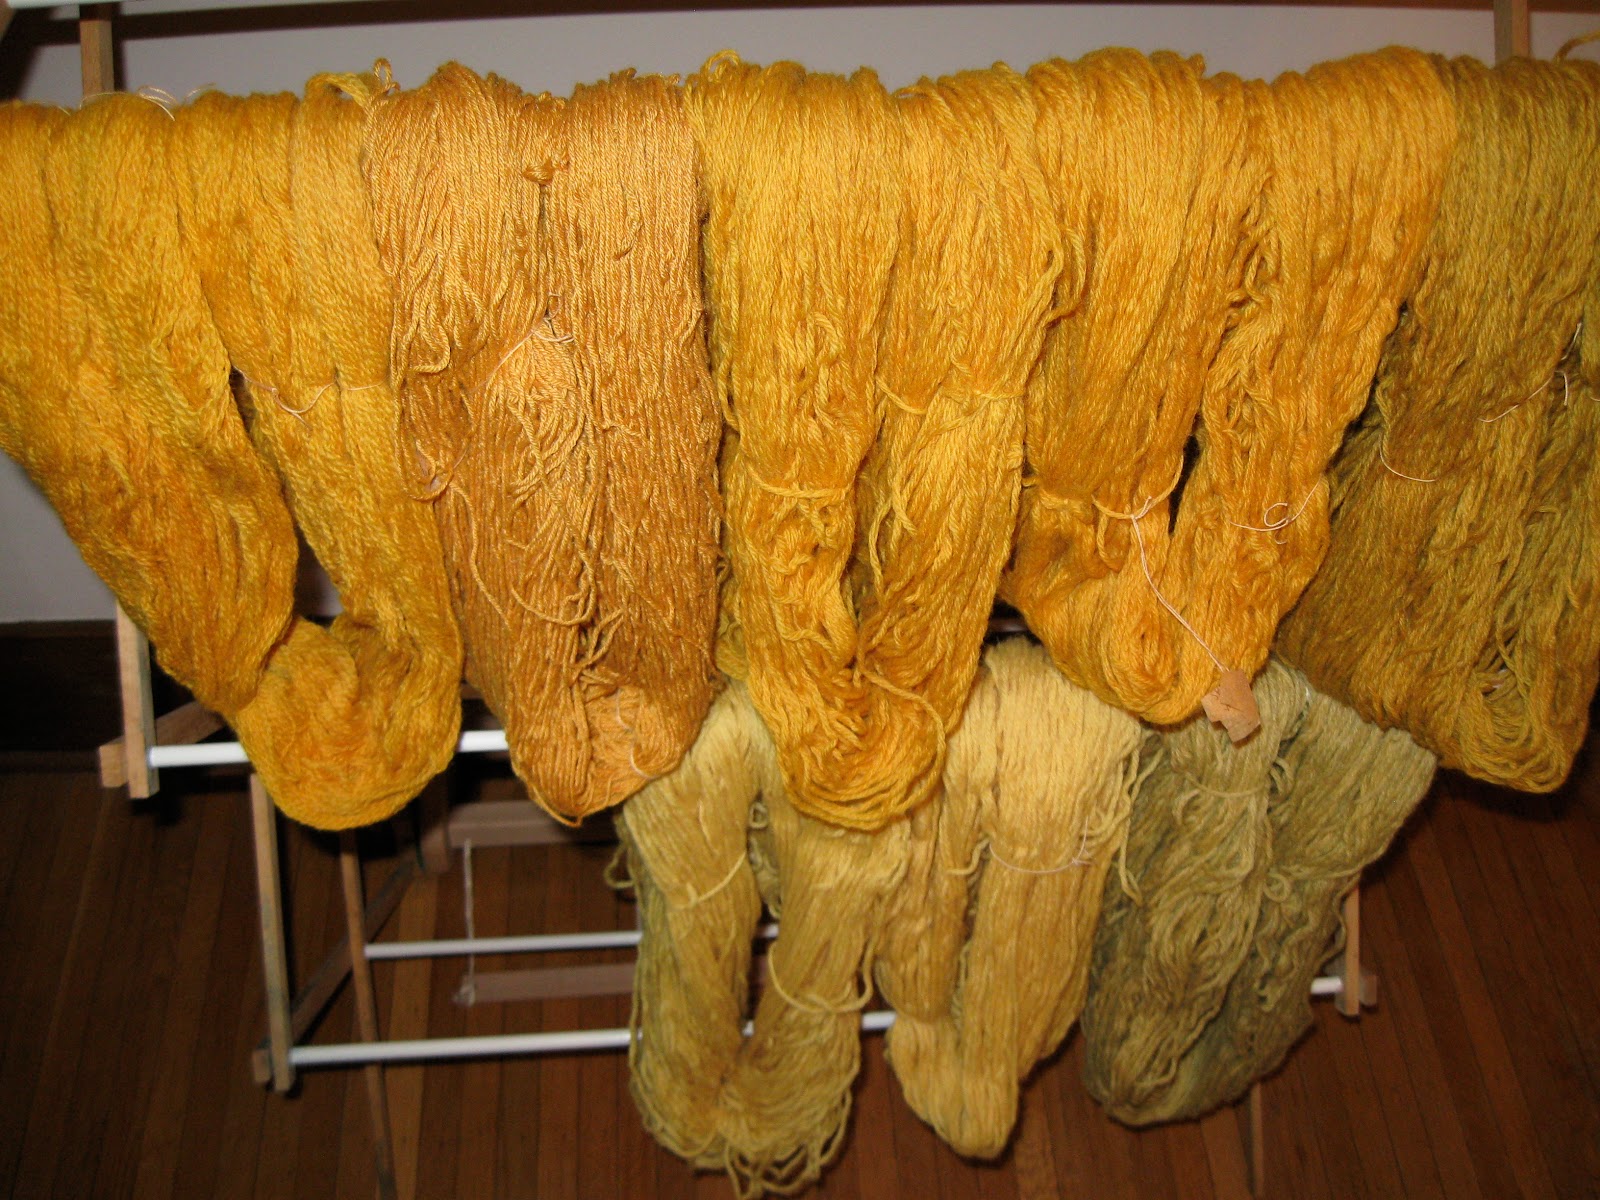
From left to right: top row is first bath- KnitPick's Peruvian wool fingering, KnitPicks Gloss fingering, 2 skeins Lion Brand Fisherman white, 1 skein Fisherman in grey. Bottom row is  the exhaust bath skeins- 2 skeins of LB Fisherman in white, 1 in grey.

I find it really interesting how different wools will take the dye differently.
The LB Fisherman white skein on the left is a slightly different tone from the KP Peruvian in the middle, & the Gloss fingering (with silk in the blend) is a golder shade.

And here are the LG Fisherman skeins, L-R: exhaust bath white, first bath white, first bath grey, exhaust bath grey. All these different colours from the same dye bath! This is why I just love natural dyeing! It takes some work, but it's like watching a miracle as it's happening.

If you happen to try this, please share your results & observations in my comments section. Thanks!