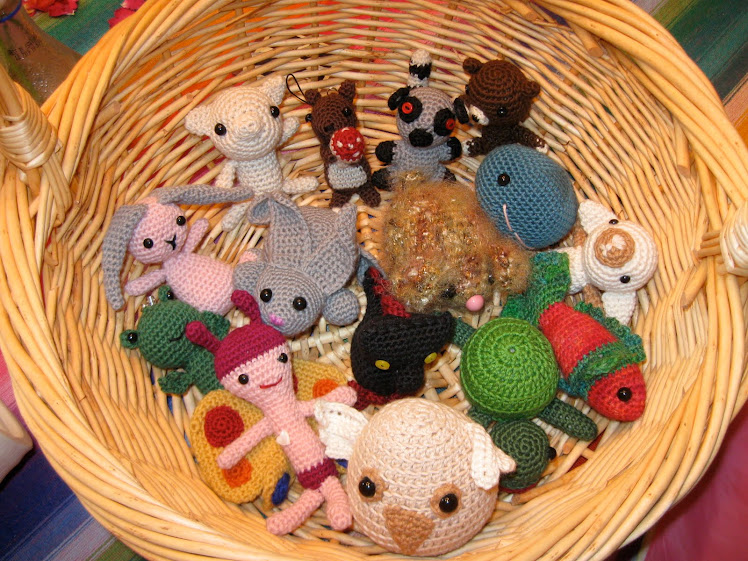
amigurumi

amigurumi
Showing posts with label prezzies. Show all posts

Saturday, June 25, 2011

We Interrupt This (Ir)regularly Scheduled Programme...

Hi there! As of tomorrow, June 26th, 2011, this fibre/craft blog will temporarily become a travel blog. We are leaving tomorrow for nearly 3 weeks in Japan! We've been planning this trip for nearly a year, & the prep included my having reconstructive back surgery (!) in January because otherwise I wouldn't have been able to tolerate flying.

This will be our third trip to Japan, our first being 4 years ago. As I may have mentioned before, my son & I have been studying Japanese for 6 years. Our first trip was a reward of sorts, & a boost to continue our studies. Brendan was 11 years old then, & part of this trip was a visit to the family of our first Japanese teacher, Tomoko, on Kyushu. We stayed with her mom, who lives next door to Tomoko's sister & family, including 2 boys slightly younger than Brendan. While we were there we visited the boys' elementary school & took a weekend trip to Asosan, an active volcano, & stayed at onsen & ryokan (tradition hot springs & inns). It was absolutely amazing!! We also discovered one of our favourite places in the world, Uji, which is near Kyoto in the tea-growing region there. It's a beautiful town with many old temples & shrines & very historic.

For our second trip, 2 years ago this past Spring, we decided to go during Spring Break, rather than in the summer, to see the cherry blossoms (see top photo). We could only go for 2 weeks that time, which I found to be a bit short. We didn't make it to the south of Japan that time, but did go back to Uji for a day while we were in Kyoto.

So this time we are going back in the summer, so we can stay longer (although it will be hotter...). When we first get to Tokyo we're going to de-jet-lag for a few days in a hotel in Shinjuku, normally not a place we'd stay because it's so busy. Which is why we thought it would be fun to stay there briefly. And, as it turns out, one of the coolest stores for crafters, Tokyo Hands, is right across the street from our hotel! Whoo hoo! Plus, a branch of Yuzawaya, another wonderful place that sells crafts, yarn, etc is right next to Tokyo Hands. I visited the main store on our last trip to Tokyo & it was amazing...

After we've recovered from flying (& before I buy too much yarn & stuff...) we're going back to see Tomoko's family in the south of Japan. We've got our JR passes & will board the shinkansen (bullet train) on Thursday for Kyushu. All of our boys have grown so much in the past 4 years & we're looking forward to seeing Tomoko & her family. While looking for an activity for the boys to do together, we suggested to Tomoko that they might like to try Dungeons & Dragons (since they really like computer games) & she thought that was a great idea, so I found the starter set at Amazon.jp and Brendan used it to learn the Japanese terms for gameplay & to make a scenario for a game (plus had our present Japanese teacher translate the character sheet for him). Brendan's been our local DM for over a year (we have an intergenerational D&D group that meets about once a month) & he's looking forward to stretching his DM skills in another language :) I'm looking forward to doing some cooking with Tomoko's mom, & have translated some recipes for scones & cookies into Japanese so we can make some together as well. Kind of a cooking exchange :)
Here is our dining room table about 4 weeks ago, with Settlers of Catan battling it out with 4 boxes that we sent to Japan in anticipation of our trip. The boxes have presents & baking paraphernalia & weighed a total of 32 lbs. It was quite a project to get them sent (customs forms, 'nuff said) & a great relief as well.

After about 5 days with Tomoko's family, we head back north to Uji to stay for 2 nights in a lovely place called the Hana Yashiki (Flower Mansion) right on the Uji river. Then we head to Tokyo for a week to see Momo (yay!) my good friend who I met while she was living nearby while her husband was in grad school. Momo moved back to Japan just a year ago & even though we skype regularly, I can't wait to see her!! We'll also see our neighbour's daughter, who is a school teacher in Tokyo & who we do fun things with every time we go, & will meet up with some other folks as well.

To prepare for this trip, I also did some crafting :) First, there was the tea cozy project, all of which were packed into the boxes sent about a month ago. Over this past week I've also made rhubarb marmalade, which I often send to Tomoko's family because they really like it, & a bunch of lavender-mint lip balms.

The lip balm is my own recipe & made with all-organic ingredients.
I am particularly happy about the labels (thank you Avery label maker!):
I managed to make them in Japanese & English! When we're in Japan we often give small gifts to people we meet who have been kind to us (it's a custom there) so I like to be well-prepared. We also bring postcards from our home town because people like to know where you're from, & candies made locally.

So please stay tuned for updates over the next few weeks. We won't always have internet access, but I plan to put up a post (eventually) for every day of the trip. おたのしみにしてください!Please look forward to it! 

Wednesday, May 18, 2011

The Final Tea Cosy is Done!

I am so relieved! I like the way they all turned out, too (whew!). This is the second one made from Noro Silk Garden worsted wool (it's in colour #276). The trivet is motif #57 from Edie Eckman's Beyond the Square- Crochet Motifs. As with the other one, I used a G/6/4.25mm hook & it took just 1 skein to make (with a little left over).
Packing these to send to Japan has worked really well, too, because I can use the box they came in.
I take off the lid & put the cosy back on the tea pot,
fold down the liner & put the lid on it,
add the trivet,
close it up & label it for the recipient! Yay!

A Nerd Wars friend over at Ravelry asked for more specific instructions for making the cozies, so I'm going to try & write it out here.

I used 2 different yarns, KnitPicks Swish DK (123 yds./50 gm) and Noro Silk Garden worsted (100m/50 gm). Because of the difference in the weights of yarn, there are 2 different patterns, so I will put the worsted info in ( ).

This cosy, in either weight of yarn, fits a small, 20 oz tea pot (mine were from Republic of Tea).

Hook size that I used: E/4/3.5mm (G/6/4.24mm).

The cosy begins with a crocheted band that is slip-stitched together into a loop, then the shell stitches are made along the side of the band. This solves the problem of a crocheted cosy not being stretchy enough to fit over the tea pot. Here's what it looks like at the bottom:
To begin, chain 5 (4). Beginning in 2nd chain from hook, single crochet across- 4 (3) sc.
Next row: Single crochet in back loop only across row, chain 1, turn.
Repeat this row until you have 56 (48) rows.
Put foundation chain together with row just finished, making a loop (make sure it's not twisted). Working with foundation chain in front, make a slip-stitch through a foundation chain &  back loop of next stitch to be worked. Continue across row, end with a chain-1, cut yarn with a 6"-8" tail & pull through to fasten-off.

Body of cozy, first side:

Row 1: [RS] Begin where you slip-stitched the band together. Make a sliding loop on hook & sc into hole to left of slip-stitched row if you're right-handed or right of slip-stitch row if you're a lefty. If you look along the band, there is a series of bumps (made of 2 rows of sc). In the first bump, make a 5-double-crochet shell, then single-crochet in the next bump. Repeat this until you have 7 (6) shells, ending with a sc. Chain 3 & turn.

Row 2: [WS] Double-crochet in the same sc as chain-3, single-crochet in the middle stitch of the next shell, *5-dc shell in next sc, sc in middle stitch of next shell* repeat to the end, ending with 2 dc in first sc in row below. Chain 1 & turn.

Row 3: [RS] Sc in first dc, *make shell in sc & sc in middle stitch of shell* repeat  across, ending with a sc. Chain 3 & turn.

Row 4: [WS] Repeat row 2.

Row 5: Repeat row 3.

Row 6: Repeat row 2.

For DK weight yarn, make 2 more rows (8 total), fasten off.

For worsted weight yarn, stop here & fasten off.

Second side of cozy:

Row 1: [WS- shaping is reversed for 2nd side of cozy] Make a sliding loop & fasten yarn with a sc in hole on the other side of the slip-stitch row on the band.

Work the second side as the first, but, as mentioned in row 1, you're starting on the WS & will finish on the RS, which will allow you to keep going when you've finished the second side. In other words, after row 8 (6) do not fasten off.

Top of cosy for DK weight yarn:

Round 1: [always on RS now] Pull up a loop in sc just worked, and another one in first sc on the first side of cosy, bridging the gap, sc these stitches together. *Make a 4-dc shell in each sc, sc in middle stitch of each shell* repeat around (repeat bridging at other side of cosy by pulling a loop up in the top of each ch-3, sc together), end with slip stitch in first sc- 14 shells. Chain 3 & turn.

Round 2:  1 dc in sc, *sc in 2nd dc of 4-dc shell, 3-dc shell in next sc* repeat around to beginning, 1 dc in same sc as ch-3, slip stitch to 3rd chain of ch-3. Chain 1 & turn.

Round 3: Sc in in same place as ch-1. For this row, only the shells will be worked in (this decreases the top). *Make 5-dc shell in middle stitch of next shell, sc in middle stitch of next shell* repeat around, finish with a slip-stich in first sc. Chain 3 & turn.

Round 4: 1 dc in same place, *sc in middle stitch of next shell, 3-dc shell in next sc* repeat around, end with 1 dc in same stitch as ch-3, slip-stitch in 3rd chain of ch-3. Chain 1 & turn.

Round 5: This round also only works in the shells. Sc in same place as ch-1, *work 5-dc shell in middle stitch of next shell, sc in middle stitch of next shell* around, end slip-stitch to first sc. Chain 3 & turn.

Round 6: 2 dc in same stitch as ch-3, *sc in middle stitch of next shell, 5-dc shell in next sc* around. End with 2 dc in same sc as ch-3, slip-stitch to 3rd chain of ch-3. Chain 1 & fasten off. This cozy ends with 4 shells.

Weave all ends. I block the cozies by soaking them in warm water, rolling them in a towel, then placing them on the tea pot & setting on a heating vent to dry.


Top of cosy for worsted weight yarn:

Round 1: [always on RS now] Pull up a loop in sc just worked, and another one in first sc on the first side of cosy, bridging the gap, sc these stitches together. *Make a 3-dc shell in each sc, sc in middle stitch of each shell* repeat around (repeat bridging at other side of cosy by pulling a loop up in the top of each ch-3, sc together), end with slip stitch in first sc- 12 shells. Chain 3 & turn.

Round 2:  1 dc in sc, *sc in middle of shell, 3-dc shell in next sc* repeat around to beginning, 1 dc in same sc as ch-3, slip stitch to 3rd chain of ch-3. Chain 1 & turn.

Round 3: Sc in in same place as ch-1. For this row, only the shells will be worked in (this decreases the top). *Make 5-dc shell in middle stitch of next  shell, sc in middle stitch of next  shell* repeat around, finish with a slip-stich in first sc. Chain 3 & turn.

Round 4: 1 dc in same place, *sc in middle stitch of next shell, 3-dc shell in next sc* repeat around, end with 1 dc in same stitch as ch-3, slip-stitch in 3rd chain of ch-3. Chain 1 & turn.

Round 5: This round also only works in the shells. Sc in same place as ch-1, *work 5-dc shell in middle stitch of next shell, sc in middle stitch of next shell* around, end slip-stitch to first sc. Chain 3 & turn.

Round 6: 2 dc in same stitch as ch-3, *sc in middle stitch of next shell, 5-dc shell in next sc* around. End with 2 dc in same sc as ch-3, slip-stitch to 3rd chain of ch-3. Chain 1 & fasten off. This cozy ends with 3 shell stitches.

Weave all ends. I block the cozies by soaking them in warm water, rolling them in a towel, then placing them on the tea pot & setting on a heating vent to dry.

I hope these instructions are clear. Let me know if they need correcting or explaining.

Tuesday, May 17, 2011

More Tea Cozies

Oh my goodness & Hallelujah! I am nearly done with the tea cosy project. In another post I explained the Tea Cosy Project, but the short & sweet is that I'm making gifts to take to Japan (at the end of June) & hope to send as much as possible (as soon as possible) by mail. Which means that I need to be done with said gifts so I can mail them...

 I hit a wall (which happens a lot when I try to make a bunch of the same thing) which slowed me down a bit. But the latest three are done, along with their matching hot-pads/trivety-things. In fact, the first teapot & cozy are on their way to their recipient, whom we will be meeting in Japan, but lives in the US these days. I thought it would be kinder to send their gifts before they leave for Japan so they won't have to drag them around Japan all summer.
So four are made & the last one is partly done, hooray! I started the project using KnitPicks Swish DK superwash wool in multicolours, & the teal/burnt orange & rainbow ones are in this yarn.Then I hit that wall...
I enjoyed picking out motifs to crochet for the trivets, & that kept me going...
I really like both of these motifs as trivets, as they are dense & cushy & will help retain the heat well. I found all the motifs that I'm using in Edie Beckman's Beyond the Square-Crochet Motifs.

Then I received an order of sale wool from Halcyon & the wall just melted :) I had ordered some Noro Silk Garden on sale in 3 different colourways. Actually, I thought I was ordering the sport weight wool, but it turned out to be the worsted... what to do? The cozies I've crocheted so far are in DK weight... should I try to change the pattern I made for the others...?

That's exactly what I did, basically by picking up a (larger) hook- I used a G/6/4.25mm- and winging it. I ripped a bit but the adaptation came quickly, & being in e heavier weight yarn, the cozy worked-up even faster. yay! The cosy & trivet took just under 1 skein of the yarn (~100 m). Plus, I got to use new, gorgeous yarn almost right out of the box!!
You might be able to see, there are 3 petals around the tea pot knob with the Noro yarn, where there are 4 petals with the DK yarn.
The two sides are slightly different (since I crocheted each side separately & then united them above the handle/spout). But I really like the way they turned out! And only one more to go!!! I really hope that folks like them...

Thursday, May 5, 2011

Tea Cozy Project

At the end of June my family & I will make our third visit to Japan. My son Brendan & I have been studying Japanese for nearly 6 years & we find an every-other-year trip to Japan really inspires us in our  studies.  Also, when we visit Japan, we visit the friends we've made over the years, & each time we go we have more people to visit & it all becomes more like a reunion than a trip :) In Japanese culture, part of visiting is bringing gifts, called omiyage, to the friends you go to see. In Japan omiyage is often food from where you live, or someplace you've visited on your travels. Since we'll be staying with friends there, we like to bring things that are made in our part of the US, or have some personal significance to us. It's always a challenge to think of things that would appeal to people from a different culture than our own, as well as appeal to people of varying ages.
Tomoko's family & our family, in front of Asosan (a live volcano) on Kyushu.
During our first visit to Japan, 4 years ago, we stayed with the family of our first Japanese teacher, Tomoko, who live in a small town outside of Fukuoka City, on the southern island of Kyushu. We had met Tomoko's mother, Nobuko-san, about a month earlier than this, when she visited Tomoko in the US. Being keen to learn some things about Japanese cooking, during her visit to our house I asked Nobuko-san (through her daughter, since she speaks very little English) if she would show me how to make tamago-yaki, since I had bought a rolled-omelet pan & wanted to see how it worked.
Getting ready for a simple tea ceremony at Nobuko-san's house.
 I also asked her to make tea for us (Nobuko-san is a tea ceremony master & teacher :) & learned more than any words could tell about how to properly make tea by just watching her. I had been hoping for some more impromptu cooking lessons when we visited Japan, but, sadly, it wasn't to be. Since I was a guest in her home, Nobuko-san wouldn't think of letting me into the kitchen :( The food was wonderful, though, but I had to observe at a distance... 

Breakfast table settings at Nobuko-san's house.
Last summer, when Tomoko was in Japan visiting her family, we Skyped with she & Nobuko-san. It was wonderful to see her & talk for the first time in 3 years. During our conversation I asked Nobuko-san, in my best Japanese, if she would allow me to cook with her. She seemed surprised & delighted, and agreed, but asked if I would teach her how to cook some western food. During intermittent discussions about this with Tomoko over the next few months, we decided a good thing for me to cook with her mom would be scones & cookies. Although ovens are not necessarily found in every kitchen in Japan (I've never seen one in any of the apartments I've stayed in there), Nobuko-san does have a small one & has been experimenting with making breads. Scones & cookies are a natural next step, so along with assembling supplies to send (like measuring cups & ingredients), and getting ready to work on translating some recipes into Japanese with our present teacher so I can make a little cook book to bring, I thought it would be fun to bring western-style teapots & crochet cozies for them, to give as omiyage to various friends in Japan.

Hence the Tea Cozy Project! I made my first crocheted tea cozy a few weeks ago (& posted about it here) & from that project I discovered some important things about crochet & tea cozies. In general, crochet is less stretchy than knitting, which is why Alice's original pattern for the Granny Tea Cozy has a button closure at the bottom. I didn't use a button for mine, but adapted the pattern so it fits over the teapot (just barely...). In designing my first cozy for the Project I decided to try making a stretchy foundation band 4 stitches wide from crochet ribbing (single crochet through the back loops only). Then I picked-up all along the edge of the band in shell stitch for the body of the cozy.
I made it from KnitPicks' Swish DK in heathered colours (sort of a heathered rainbow :) using a size E/4/3.50mm hook. The teapot is pretty small (~16 1/2" around), one of the 20 oz. ones from Republic of Tea (perfect for tea-for-two) & so the cozy worked up pretty quickly, in spite of occasional ripping (as I was creating the pattern as I went along...). 
I used shell stitch, since it's dense & makes a good fabric for keeping thing warm and I borrowed Alice's original opening in the top to let the lid peep through because it's really cute :) After washing (& blocking on the pot, over a floor vent) I am pleased with the results. Good thing- I need to make 4 more! All variations on the theme, of course. But first, I need to write the base pattern down!! Stay tuned for more cozies...

Monday, November 8, 2010

Bertie the Bus

While my son Brendan was in elementary school he was fortunate enough to have had the same consultant teacher, Cherie, from 3rd grade to 8th grade. Not only was Cherie just about everything you'd want in a consultant teacher, patient, creative, resourceful, & smart, she is also a lovely person. About when we transcended "team" and became family I'm not sure, but it may have been around the time she had her first son, who celebrated his 3rd birthday last week. Even during the summer vacations we'd try to get together with Cherie & Nick at least once to catch up & play (no work allowed!). Last February we welcomed Nick's little brother, Matt, to our extended family :) And now, since Brendan's no longer in elementary school, we have to do some planning in order to see Cherie & her guys (husband Scott included). Yesterday evening we all got together for dinner & trains & birthday prezzies- yay!

The trains are a big part of visits to our house, since Nick adores Thomas the Tank Engine just like Brendan did! It is so much fun (& nostalgic) to get Brendan's trains & track out & watch them go for it. The Thomases were one of my favourite parts of Brendan's early childhood. We started with the little figure 8 track & moved quickly into more track & accessories and larger, more elabourate layouts (that was my fun). We immersed ourselves in the big book of stories, the videos, & Brendan's first movie in a theatre was "Thomas and the Magic Railroad" when he was four. And although the Thomases have been put away for many years (replaced by nearly a million legos, I think) Brendan had as much fun playing trains yesterday as Nick did :)

For Nick's birthday I decided to make something practical plus something fun. Practical was the stripey earflap hat and fun was my attempt to make Bertie the Bus as an amigurumi. I had thought of doing Thomas but all the different planes & shapes that make up a tank engine made it hard to wrap my head around, but a bus is, essentially, a rectangle, and I can crochet rectangles!!

I wanted all the embellishments to be well tacked-on (because of baby brother), so I opted to crochet the eyes rather than use buttons. I crocheted half a circle with black & then the other half and next round with white, to give the eyes some character, & I like how they turned out. The wheels & windows are all circles & rectangles, with an embroidered smile, and the only other fancy bit was the back bumper, where I used South American crochet to carry 2 colours so I could have a contrast license plate. I didn't want it to be too big for him to grab easily, so I used KnitPicks Comfy cotton fingering weight yarn and a size C/2/2.75mm needle to make a firm fabric, then stuffed it with fibrefill.
And, true to 3-year-old form, Nick was happy to let baby brother model his hat, but he did have Bertie the Bus join in the train play, which made me very happy! :)

Friday, October 22, 2010

Lindsay's Lace

Here is another project that I was waiting to post (until after the gift was given :) but then things got busy... Our friend Lindsay got married in late August &, as she was combining households with her new husband, it took some creativity to think of something to give her that she wouldn't already have. I decided that everyone could use a little lace on occasion, & decided to make her some odds & ends that she could use around the house- under lamps, as coasters, a small runner for dinners, that sort of thing. I had already made shower presents for her (domino knitted trivet & dishcloths) using a natural palette of browns & creams, so I stayed with the same yarn (KnitPicks Simply Cotton organic yarns) but went from worsted weight to sport, for crocheted lace.

I used motifs from the wonderful book again & it was a lot of fun to mess around- combining the motifs & the colours. For example, I really love how the lace in the top picture forms a wreath in the middle when you put 4 motifs together...


Once again, this lace can be washed by machine or hand, & just patted out flat to dry. I blocked them with pins (as you can see) to make it nice, which is an easy next step, but not necessary to useability. 

I do wonder sometimes if these ideas I get for prezzies are just weird, or do they work out the way I hope? I sure hope they are enjoyed as much as I enjoyed making them!